My First LCD Monitor Repair
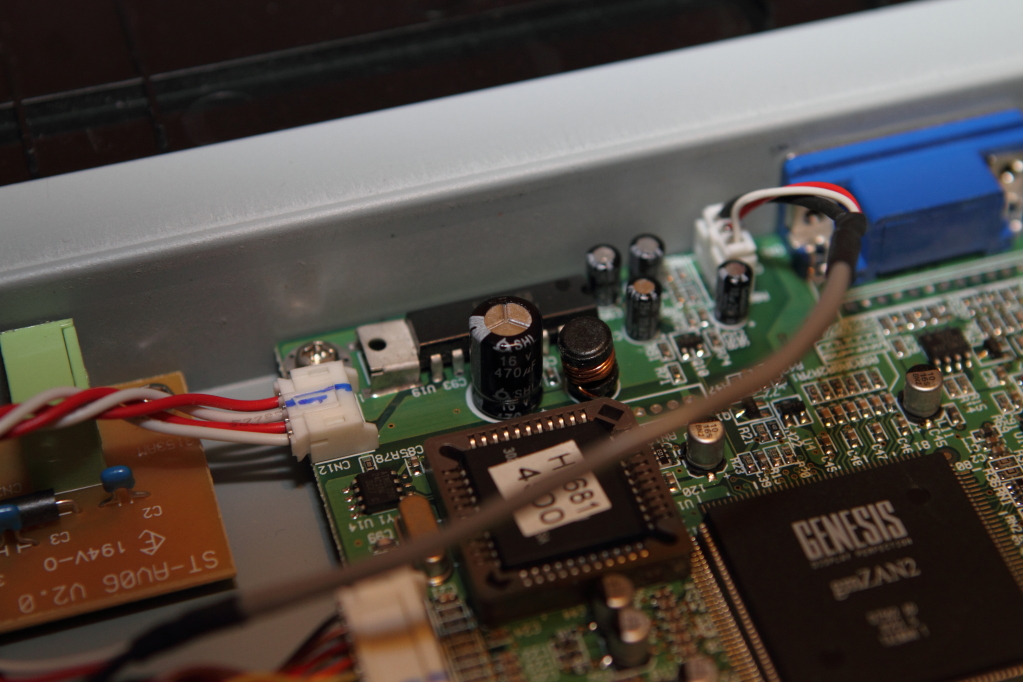
I just fixed my first LCD monitor and didn’t hurt myself and the best part is that I didn’t have any extra parts left over. Of course, I have pictures on this proud day and the details at:
http://dunphy.smugmug.com/Electronics/Gem-LCD-Repair/15699511_F2RGd#1176732917_6U7CA
I don’t think I am ready to quit the day job considering you can buy a new one for about $70 and it took me almost 4 hours. In the future, I should be able to get this down to about an hour now that I know how to use my new multimeter and electronic rework station.
Now for the technical details. These were electrolytic capacitors meaning that they use an electrolyte solution as one of the charge plates. According to wikipedia this type of capacitor offers the largest capacitance per unit volume so the physical sizes are kept small. Normally, its the area between the plates and the size of the plates that determine the capacitance. See this technical discussion for a great explanation of the physics of capacitors. The drawback of electrolytic capacitors is they require polarized voltage so you need to line up the positive and negative terminals or you will get a nice bang! Here is a fun youtube video describing what capacitors are and how to understand the writing on the sides of them. It contains some nice video footage of what happens when you put too much voltage or mismatch the polarity of them. Hint: BANG! Not to be out done, Jeri Ellsworth takes a few apart and explains it with this youtube video.
There were no noticeable or visual clues that the capacitors were bad. I looked for the tell tale signs of bad capacitors such as bulging or leaking but none was too be found in this case. I got lucky here because I didn’t remove one of the legs before measuring. I verified they were discharged and then hooked my multimeter and watched as it would discharge and then recharge before providing the measurement. From the little I know about this, I am suppose to remove at least one leg before attempting to measure them. I got lucky here because the results when I eventually did pull them showed similar results.
I found a 10V 470 uF capacitor that measured about 438uF and the other one was a 16V 470uF 105C that measured 601uF when I eventually removed them from the circuit board. I found identical replacements from an old motherboard and that was it. The 30+ pictures from my smugmug site show and describe the repair during different phases of my repair. If you are interested in why these fail so often, Dave Jones has created a nice video describing why.
A final note is that a google search for bad capacitors will yield tons of pictures and links to sites describing some bad luck that the mainstream computer companies have had with shipping of consumer products and computers. Makes you wonder how many devices are EOL early because of these problems. Good for the manufacturer but bad for the consumer who now must replace these devices much earlier then they had expected.

